DIY: Blank Bible (part 3) Slicing and Stuffing
By this point you have cut the binding off your bible. It now sits in a pile of loose pages. The next two steps are slicing and stuffing.
Slicing
We need to get blank pages cut exactly to fit our bibles. So measure the size of your loose pages. A good and accurate dimension is essential for the office supply store to cut blank pages. For the interlinear, I will need paper cut exactly 6-5/16” by 9-5/16.” If you are unsure how to measure (or if you are not skilled in fractions) you can take your bible into the store and let the friendly associate take the measurements.
If your bible is 1,000 pages long (and double-sided) there are 500 individual sheets of paper. You will need 500 blank sheets if you insert a blank page between each bible page. The total size of the bible would be 2,000 pages. Don’t even try carrying that to church!
On to paper… I am not too picky on the paper I use. Just make certain it’s acid-free. The thinnest paper I can easily access is 20 lb, and the ream comes in 500 sheets. Brightness does not matter because most bibles are off-white anyways.
Now to the office supply store. If your blank pages are less than half the size of a sheet of paper (8-1/2”x11”) you can get 1,000 sheets out of one ream. The classic reference ESV in the first project was like this. However, the interlinear pages are larger. I will need 550 blank sheets and so I will need to purchase two reams.
Using a paper cutter, the office supply store can cut the ream of paper down to your exact dimensions. Once you have them cut, it’s time to return home.
Stuffing
It’s time to assemble your blank bible. For the first blank bible I did not put a blank page in every page of the Old Testament narratives, and I put 2 blank pages in the books of Romans, Galatians and Ephesians. It just depends upon the density of note taking you are going to need. For the interlinear I will be inserting one blank page between every bible page.
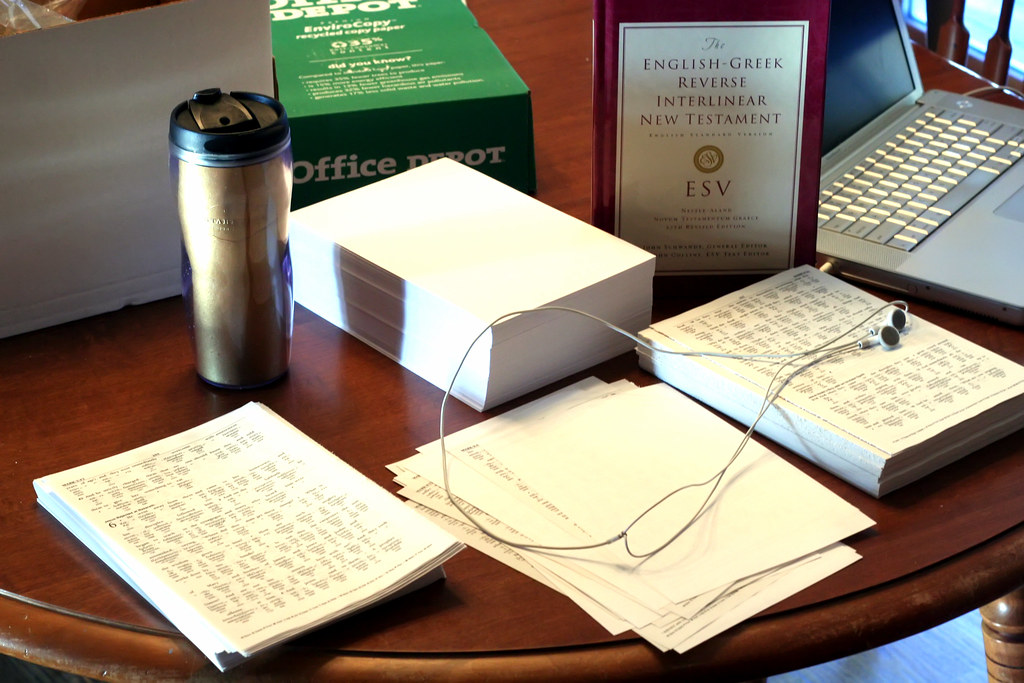 I usually set up something like this…
As you can see I have coffee and iTunes (these help deaden the painful shoulder cramps). To the back-center I place my stack of blank pages from the office supply store.
Closest to me I make three piles. To the right are the bible pages themselves. The middle pile is where I bring the blank pages and the bible pages together. With my left hand I pull down a blank page onto the pile and simultaneously with my right hand I flip a bible page from the right stack down on top of the blank page. When I’ve stacked 40-50 pages I neatly align them and stack them (without flipping them) to the pile on the far left. Because the bible paper is thinner than the blank pages, its necessary to occasionally take time to carefully align the pages together.
It’s important to always be aware of the binding edge of the bible pages. In the far right the binding edge is on the left. The middle pile its on the right. And on the far left stack its also on the right. The bible pages flow from right to left. From the first stack they are turned (like a book) onto the middle pile. But the stacks are not turned again when going from the middle to the left piles. In other words, page one of the bible would be on the top of the right pile, but the bottom of the middle and left piles. Make sense? Good.
 As you can see, the interlinear bible is going to be much larger than the 3 volume blank bible we made earlier. This will be a New Testament for the serious bible student!
It is awesome to know that God, through His Spirit, can fill every blank page through humble meditation as the “living and active” Word of God comes alive. Each blank page represents our anticipation that God will open up His Word to reveal more of the width and height and depth and length of God’s love in the Cross!
——————————–
Coming up next, the conclusion … DIY: Blank Bible (part 4) Punching and Binding

Tony, I don’t have a table saw. What do you think is the next best option for cutting the binding off? Would a smaller saw, like a jig-saw, do the trick?
Justin, you can have an office supply store try to cut the binding off with a paper knife. Take the cover off first and make certain they have the bible clamped really tight! Or it will stair-step when it cuts. I would not recommend a jig-saw though, keeping the binding edge of the paper straight is important.
Blessings,
Tony
If I was to buy a table saw, how much should I pay and what “features” should I look for?
Would a Skill saw do the same thing?
Wow. This is amazing. It would be really cool if publishers would make a bible with the print only on one side of the paper, so there’s a blank page next to each printed page.
I have not tried stuffing blanks before, but I have taken the spine off a book or two before, and I recommend going to a local printer. They generally have much much better guillotines than do Kinkos and similar.
Also, they will often not have a “price” for such services and if you’re nice they might do it for free (if it’s just a quick setup for them).